Fixing an Canon EOS 630's Batter Drain problem
I've shortened the directions on how to fix it just a tad.. but here you go:
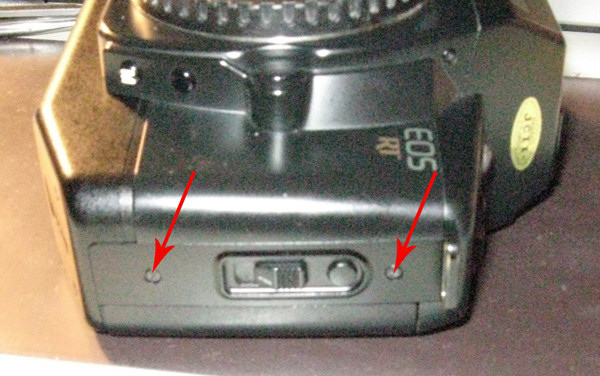
 |
| my camera with the latch plate off |
 |
| the latch plate |


Here's a link to the original directions on PopPhoto
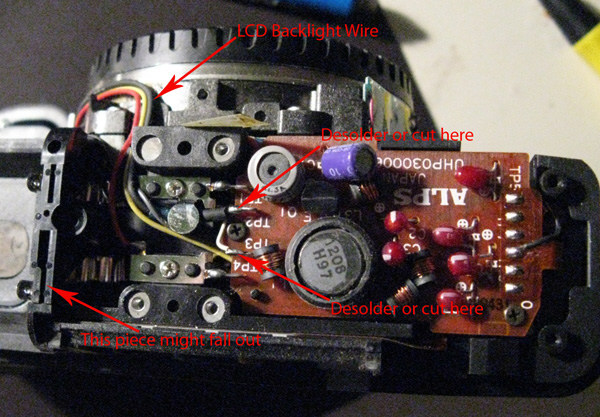
This is a common problem on the EOS 630 and the EOS RT.One theory is that the backlight, which is always connected to power, is a capacitor that eventually decomposes and starts turning into a resistor.The 'repair' is to just cut the wire that goes to the backlight. This fix should stop the battery drain, but won't fix your backlight.
1) Remove the grip. Remove the battery, remove the film.2) Remove latch cover - two screws. Be careful. four parts will fall out: the cover, the release slider, the release button and the release button spring. pay attention to how it is assembled. You will have to reassemble it later.
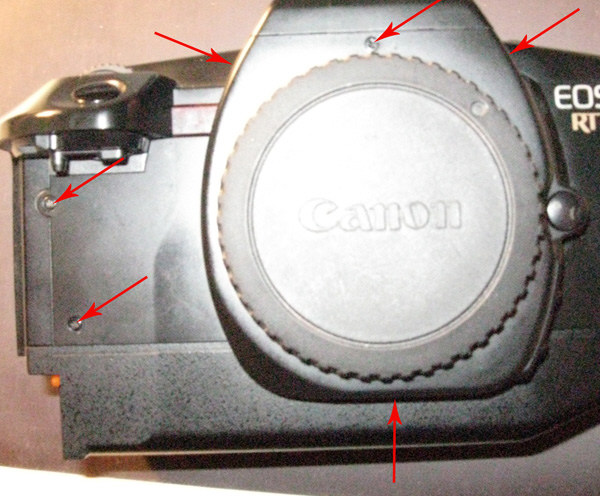
3) Remove the front cover - six screws. There are two buttons that will most likely fall out
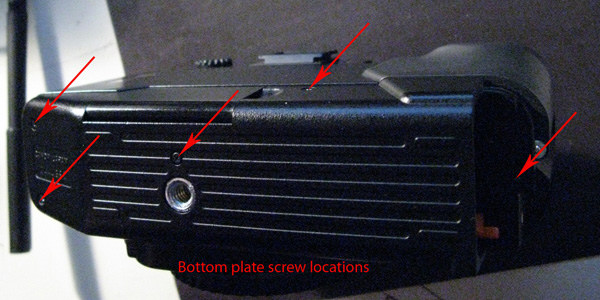
4) Remove the bottom cover. Five screws.
5) Remove the tripod mount. three screws
6) Clip the black wire and the white wire at their solder points.
7) put a piece of tape over the end, of the black and white wires.
8) Put the tripod mount back on
9) Put the bottom back on
10) Put the front cover back on. Look at the flat spots on the buttons,
the M button goes on bottom.
11) Put latch cover on. This is tricky. The release button has a groove that fits into the release slider, and then the button goes on top of the spring that goes on top of the post.
12) Put the battery in
13) Put the grip on


Comments
Post a Comment
please be respectful in your comments. God Bless you!